Unused files
Jump to navigation
Jump to search
The following files exist but are not embedded in any page. Please note that other web sites may link to a file with a direct URL, and so may still be listed here despite being in active use.
Showing below up to 241 results in range #1,001 to #1,241.
View (previous 500 | next 500) (20 | 50 | 100 | 250 | 500)
 Mystery Chronicles Murder Among Friends-2008-Puzzle-Chapter 1-Letter Solution.png 1,024 × 768; 1.15 MB
 Mystery Chronicles Murder Among Friends-2008-Puzzle-Chapter 5-Block 1 Solution.png 1,024 × 768; 1.08 MB
 Mystery Chronicles Murder Among Friends-2008-Puzzle-Chapter 5-Block 2 Solution.png 1,024 × 768; 1.09 MB
 Mystery Chronicles Murder Among Friends-2008-Puzzle-Chapter 5-Block 3 Solution.png 1,024 × 768; 1.11 MB
 Mystery Chronicles Murder Among Friends-2008-Puzzle-Chapter 5-Mirrors Solution.png 1,024 × 768; 1.33 MB
 1990 Bronx Warriors-1982-DVD-1.jpg 331 × 450; 107 KB
 2001 A Space Odyssey-1968-Polish-Poster-1.jpg 373 × 577; 27 KB
 2001 A Space Odyssey-1968-Poster-1.jpg 350 × 549; 33 KB
 2001 A Space Odyssey-1968-Poster-2.jpg 1,143 × 819; 184 KB
 2001 A Space Odyssey-1968-Poster-3.jpg 2,024 × 3,048; 1.51 MB
 2001 A Space Odyssey-1968-Poster-4.jpg 2,088 × 3,056; 1.03 MB
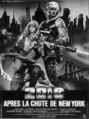 2019 After the Fall of New York-1983-French-Poster-1.jpg 374 × 502; 80 KB
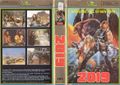 2019 After the Fall of New York-1983-UK-VHS-1a.jpg 1,166 × 830; 366 KB
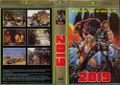 2019 After the Fall of New York-1983-UK-VHS-1b.jpg 1,000 × 709; 236 KB
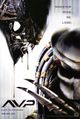
 AVP Alien vs. Predator-2004-Poster-1.jpg 485 × 729; 63 KB
 AVP Alien vs. Predator-2004-Poster-2.jpg 485 × 729; 61 KB
 AVP Alien vs. Predator-2004-Poster-3.jpg 430 × 640; 57 KB
 AVP Alien vs. Predator-2004-Poster-4.jpg 510 × 755; 95 KB
 A Nightmare on Elm Street 2 Freddy's Revenge-1985-Poster-1.jpg 493 × 755; 81 KB
 A Nightmare on Elm Street 3 Dream Warriors-1987-Poster-1.jpg 816 × 1,239; 307 KB
 A Nightmare on Elm Street 3 Dream Warriors-1987-Poster-2.jpg 494 × 755; 65 KB
 A Nightmare on Elm Street 3 Dream Warriors-1987-Thai-Poster-1.jpg 1,276 × 816; 219 KB
 A Nightmare on Elm Street 4 The Dream Master-1988-Poster-1.jpg 482 × 755; 87 KB
 Alien Resurrection-1997-DVD-1.jpg 425 × 591; 38 KB
 Alien Resurrection-1997-French-Poster-1.jpg 350 × 480; 22 KB
 Alien Resurrection-1997-Poster-1.jpg 357 × 525; 61 KB
 Alien Resurrection-1997-Poster-2.jpg 300 × 449; 17 KB
 Alien Resurrection-1997-Poster-3.jpg 184 × 290; 7 KB
 Alien Resurrection-1997-Poster-4.jpg 392 × 575; 30 KB
 Alligator II The Mutation-1991-VHS-1.jpg 222 × 400; 16 KB
 Anacondas The Hunt for the Blood Orchid-2004-Poster-1.jpg 400 × 597; 36 KB
 Beaks The Movie-1987-VHS-1.jpg 293 × 526; 35 KB
 Behind the Mask The Rise of Leslie Vernon-2006-Poster-1.jpg 503 × 755; 92 KB
 Behind the Mask The Rise of Leslie Vernon-2006-Poster-2.jpg 450 × 663; 53 KB
 Blindfold Acts of Obsession-1994-Swedish-VHS-1.jpg 1,000 × 716; 205 KB
 Blood Feast 2 All U Can Eat-2002-Poster-1.jpg 200 × 321; 28 KB
 Cheryl Hansson Cover Girl-1981-Swedish-VHS-1.jpg 1,000 × 719; 137 KB
 Citizen Toxie The Toxic Avenger IV-2000-Poster-1.jpg 554 × 750; 83 KB
 Code Name Wild Geese-1984-Poster-1.jpg 337 × 500; 100 KB
 Code Name Wild Geese-1984-Swedish-VHS-1.jpg 1,000 × 697; 220 KB
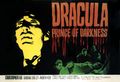 Dracula Prince of Darkness-1966-Poster-1.jpg 1,435 × 983; 156 KB
 Joe Dancer The Big Trade-1981-Swedish-VHS-1.jpg 1,000 × 712; 238 KB
 Tarantulas The Deadly Cargo-1977-Swedish-VHS-1.jpg 1,000 × 704; 190 KB
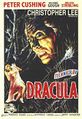 Dracula Prince of Darkness-1966-Poster-2.jpg 300 × 437; 31 KB
 Emerald City Confidential-2009-Title.png 800 × 600; 705 KB
 Campfire Legends The Hookman-2009-Puzzle-Basement-Fuses Help.png 1,024 × 768; 1.1 MB
 Campfire Legends The Hookman-2009-Puzzle-Basement-Fuses Tips.png 1,024 × 768; 1.07 MB
 Campfire Legends The Hookman-2009-Puzzle-Bedroom-Phone Solution.png 1,024 × 768; 1.27 MB
 Campfire Legends The Hookman-2009-Puzzle-Bedroom-Radio Solution.png 1,024 × 768; 1.29 MB
 Campfire Legends The Hookman-2009-Puzzle-Bedroom-Radio Tips.png 1,024 × 768; 1.14 MB
 Campfire Legends The Hookman-2009-Puzzle-Boathouse-Circles Solution.png 1,024 × 768; 1.35 MB
 Campfire Legends The Hookman-2009-Puzzle-Boathouse-Circles Tips.png 1,024 × 768; 1.18 MB
 Campfire Legends The Hookman-2009-Puzzle-Boathouse-Decoder Solution.png 1,024 × 768; 1.19 MB
 Campfire Legends The Hookman-2009-Puzzle-Boathouse-Door Solution.png 1,024 × 768; 1.36 MB
 Campfire Legends The Hookman-2009-Puzzle-Boathouse-Door Tips.png 1,024 × 768; 1.14 MB
 Campfire Legends The Hookman-2009-Puzzle-Boathouse-Punch Card Solution.png 1,024 × 768; 1.3 MB
 Campfire Legends The Hookman-2009-Puzzle-Boathouse-Punch Card Tips.png 1,024 × 768; 1.12 MB
 Campfire Legends The Hookman-2009-Puzzle-Car-Mirror Solution.png 1,024 × 768; 1.06 MB
 Campfire Legends The Hookman-2009-Puzzle-Car-Tires Tips.png 1,024 × 768; 1.11 MB
 Campfire Legends The Hookman-2009-Puzzle-Car-Wires Solution.png 1,024 × 768; 1.18 MB
 Campfire Legends The Hookman-2009-Puzzle-Car-Wires Tips.png 1,024 × 768; 1.11 MB
 Campfire Legends The Hookman-2009-Puzzle-Cemetery-Crypt 2-Blocks 1 Solution.png 1,024 × 768; 1.36 MB
 Campfire Legends The Hookman-2009-Puzzle-Cemetery-Crypt 2-Blocks 1 Tips.png 1,024 × 768; 1.17 MB
 Campfire Legends The Hookman-2009-Puzzle-Cemetery-Crypt 2-Blocks 2 Solution.png 1,024 × 768; 1.31 MB
 Campfire Legends The Hookman-2009-Puzzle-Cemetery-Crypt 2-Blocks 2 Tips.png 1,024 × 768; 1.15 MB
 Campfire Legends The Hookman-2009-Puzzle-Cemetery-Crypt 2-Circles Solution.png 1,024 × 768; 1.32 MB
 Campfire Legends The Hookman-2009-Puzzle-Cemetery-Crypt 2-Circles Tips.png 1,024 × 768; 1.18 MB
 Campfire Legends The Hookman-2009-Puzzle-Living Room 2-Phone Solution.png 1,024 × 768; 1.19 MB
 Campfire Legends The Hookman-2009-Puzzle-Living Room 2-Phone Tips.png 1,024 × 768; 1.1 MB
 Campfire Legends The Hookman-2009-Puzzle-Porch-Shutters Solution.png 1,024 × 768; 1.22 MB
 Campfire Legends The Hookman-2009-Puzzle-Woods-Kindling Tips.png 1,024 × 768; 1.14 MB
 Azkend-2009-Screenshot-1.jpg 320 × 480; 71 KB
 Azkend-2009-Screenshot-2.jpg 320 × 480; 58 KB
 Azkend-2009-Screenshot-3.jpg 320 × 480; 89 KB
 Azkend-2009-Screenshot-4.jpg 320 × 480; 80 KB
 Azkend-2009-Screenshot-5.jpg 320 × 480; 110 KB
 Toy Monkey-2010-Screenshot-1.jpg 320 × 480; 43 KB
 Toy Monkey-2010-Screenshot-2.jpg 320 × 480; 35 KB
 Toy Monkey-2010-Screenshot-3.jpg 320 × 480; 31 KB
 Toy Monkey-2010-Screenshot-4.jpg 320 × 480; 47 KB
 Toy Monkey-2010-Screenshot-5.jpg 640 × 960; 100 KB
 Zentomino-2009-Puzzle-Page 01 Solution.png 960 × 640; 1.47 MB
 Zentomino-2009-Puzzle-Page 02 Solution.png 960 × 640; 1.48 MB
 Zentomino-2009-Puzzle-Page 03 Solution.png 960 × 640; 1.47 MB
 Zentomino-2009-Puzzle-Page 04 Solution.png 960 × 640; 1.48 MB
 Zentomino-2009-Puzzle-Page 05 Solution.png 960 × 640; 1.48 MB
 Zentomino-2009-Puzzle-Page 06 Solution.png 960 × 640; 1.48 MB
 Zentomino-2009-Puzzle-Page 07 Solution.png 960 × 640; 1.48 MB
 Zentomino-2009-Puzzle-Page 08 Solution.png 960 × 640; 1.48 MB
 Zentomino-2009-Puzzle-Page 09 Solution.png 960 × 640; 1.48 MB
 Zentomino-2009-Puzzle-Page 10 Solution.png 960 × 640; 1.48 MB
 Zentomino-2009-Puzzle-Page 11 Solution.png 960 × 640; 1.48 MB
 Zentomino-2009-Puzzle-Page 12 Solution.png 960 × 640; 1.49 MB
 Zentomino-2009-Puzzle-Page 13 Solution.png 960 × 640; 1.48 MB
 Zentomino-2009-Puzzle-Page 14 Solution.png 960 × 640; 1.47 MB
 Zentomino-2009-Puzzle-Page 15 Solution.png 960 × 640; 1.48 MB
 Zentomino-2009-Puzzle-Page 16 Solution.png 960 × 640; 1.49 MB
 Zentomino-2009-Puzzle-Page 17 Solution.png 960 × 640; 1.48 MB
 Zentomino-2009-Puzzle-Page 18 Solution.png 960 × 640; 1.48 MB
 Zentomino-2009-Puzzle-Page 19 Solution.png 960 × 640; 1.49 MB
 Zentomino-2009-Puzzle-Page 20 Solution.png 960 × 640; 1.49 MB
 Zentomino-2009-Puzzle-Page 21 Solution.png 960 × 640; 1.49 MB
 Zentomino-2009-Puzzle-Page 22 Solution.png 960 × 640; 1.48 MB
 Zentomino-2009-Puzzle-Page 23 Solution.png 960 × 640; 1.48 MB
 Zentomino-2009-Puzzle-Page 24 Solution.png 960 × 640; 1.49 MB
 Zentomino-2009-Puzzle-Page 25 Solution.png 960 × 640; 1.49 MB
 Angel Town-1990-DVD-1.jpg 333 × 474; 58 KB
 Angel Town-1990-Poster-1.jpg 580 × 834; 119 KB
 Angel Town-1990-Poster-2.jpg 580 × 909; 215 KB
 Beyond Darkness-1990-VHS-1.jpg 324 × 572; 38 KB
 Bloodmoon-1990-DVD-1.jpg 376 × 570; 48 KB
 Bloodmoon-1990-UK-DVD-1.jpg 354 × 500; 29 KB
 Cartel-1990-DVD-1.jpg 343 × 475; 43 KB
 Celebrity Guide to Wine-1990-VHS-1.jpg 200 × 372; 17 KB
 Dracula A.D. 1972-1972-French-Poster-1.jpg 1,078 × 1,461; 321 KB
 Dracula A.D. 1972-1972-Poster-1.jpg 350 × 424; 39 KB
 Dracula Sucks-1979-Poster-1.jpg 512 × 382; 42 KB
 Dracula in Instanbul-1953-Turkish-Poster-1.jpg 1,425 × 2,108; 830 KB
 Dracula vs. Frankenstein-1970-VHS-1.jpg 292 × 522; 40 KB
 Dracula vs. Frankenstein-1971-Poster-1.jpg 534 × 768; 89 KB
 Dracula's Great Love-1972-Poster-1.jpg 250 × 355; 21 KB
 Dracula-1973-Poster-1.jpg 952 × 1,384; 218 KB
 Dracula-1979-Poster-1.jpg 510 × 755; 99 KB
 Dracula-1979-Swedish-Poster-1.jpg 310 × 434; 36 KB
 Dragon Lady-1974-Swedish-VHS-1.jpg 1,000 × 722; 152 KB
 Dragon from Russia-1990-UK-DVD-1.jpg 430 × 604; 224 KB
 Dragonheart-1996-Poster-1.jpg 350 × 514; 48 KB
 Dragonslayer-1981-German-Poster-1.jpg 427 × 609; 74 KB
 Dragonslayer-1981-Poster-1.jpg 400 × 604; 44 KB
 Dragstrip Girl-1957-Poster-1.jpg 1,112 × 1,761; 615 KB
 Drakula Halala-1923-Hungarian-Poster-1.jpg 243 × 350; 44 KB
 Mystery Masterpiece The Moonstone-2009-Puzzle-Drusilla's Room-Pamphlet Solution.png 1,024 × 768; 1.39 MB
 Mystery Masterpiece The Moonstone-2009-Puzzle-Guest Room-Letter 2 Solution.png 1,024 × 768; 1.21 MB
 Mystery Masterpiece The Moonstone-2009-Puzzle-Muddy Docks-Mud Solution.png 1,024 × 768; 1.22 MB
 Mystery Masterpiece The Moonstone-2009-Puzzle-Rachel's Room-Letter 1 Solution.png 1,024 × 768; 1.17 MB
 Mystery Masterpiece The Moonstone-2009-Title.png 1,024 × 768; 1.12 MB
 Goddess Chronicles-2010-Puzzle-Hades Pipe Solution.png 1,024 × 768; 1.18 MB
 Goddess Chronicles-2010-Puzzle-Level 12 Tile Solution.png 1,024 × 768; 1.21 MB
 Goddess Chronicles-2010-Puzzle-Level 13 Block Solution.png 1,024 × 768; 1.24 MB
 Goddess Chronicles-2010-Puzzle-Level 14 Object Solution.png 1,024 × 768; 1.15 MB
 Goddess Chronicles-2010-Puzzle-Level 15 Tile Solution.png 1,024 × 768; 1.17 MB
 Goddess Chronicles-2010-Puzzle-Level 16 Block Solution.png 1,024 × 768; 1.29 MB
 Goddess Chronicles-2010-Puzzle-Level 19 Object Solution.png 1,024 × 768; 1.34 MB
 Goddess Chronicles-2010-Puzzle-Level 2 Object Solution.png 1,024 × 768; 1.5 MB
 Goddess Chronicles-2010-Puzzle-Level 23 Block Solution.png 1,024 × 768; 1.25 MB
 Goddess Chronicles-2010-Puzzle-Level 23 Tile Solution.png 1,024 × 768; 1.47 MB
 Goddess Chronicles-2010-Puzzle-Level 4 Block Solution.png 1,024 × 768; 1.17 MB
 Goddess Chronicles-2010-Puzzle-Level 4 Tile Solution.png 1,024 × 768; 1.41 MB
 Goddess Chronicles-2010-Puzzle-Level 5 Object Solution.png 1,024 × 768; 1.2 MB
 Goddess Chronicles-2010-Puzzle-Level 7 Tile Solution.png 1,024 × 768; 1.15 MB
 Goddess Chronicles-2010-Puzzle-Level 8 Block Solution.png 1,024 × 768; 1.28 MB
 Goddess Chronicles-2010-Puzzle-Level 9 Object Solution.png 1,024 × 768; 1.33 MB
 Goddess Chronicles-2010-Puzzle-Poseidon Pipe Solution.png 1,024 × 768; 1.57 MB
 Goddess Chronicles-2010-Puzzle-Zeus Pipe Solution.png 1,024 × 768; 1.59 MB
 Goddess Chronicles-2010-Title.png 1,024 × 768; 1.53 MB
 Dream Machine-1991-Danish-VHS-1.jpg 1,000 × 713; 212 KB
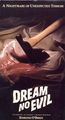 Dream No Evil-1970-Poster-1.jpg 250 × 460; 38 KB
 Dreamscape-1984-Poster-1.jpg 329 × 506; 51 KB
 Deceptions-1985-Swedish-VHS-1.jpg 1,000 × 707; 205 KB
 Dr. Phibes Rises Again!-1972-Poster-2.jpg 343 × 614; 57 KB
 Drive In Massacre-1977-UK-VHS-1.jpg 1,000 × 764; 222 KB
 Drive In Massacre-1977-VHS-1.jpg 1,166 × 828; 356 KB
 Drive Thru-2007-Poster-1.jpg 305 × 439; 26 KB
 Drop-Out Wife-1972-Poster-1.jpg 277 × 423; 29 KB
 Drum-1976-Betamax-1.jpg 1,160 × 846; 304 KB
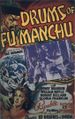 Drums of Fu Manchu-1940-Poster-1.jpg 675 × 1,071; 230 KB
 Duel-1971-Poster-1.jpg 497 × 755; 85 KB
 Dune Warriors-1990-UK-VHS-1.jpg 1,000 × 710; 173 KB
 Dune Warriors-1990-VHS-1.jpg 361 × 600; 58 KB
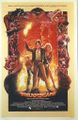
 Dune-1984-Poster-1.jpg 360 × 555; 25 KB
 Dune-1984-Poster-2.jpg 361 × 555; 40 KB
 Dutch Girls-1985-UK-VHS-1.jpg 1,004 × 784; 305 KB
 The Darkest Puzzle-1-Homepage.png 1,053 × 2,785; 244 KB
 The Darkest Puzzle-2-How To Be Useful.png 1,053 × 3,006; 223 KB
 The Darkest Puzzle-3-To The Rescue.png 1,053 × 10,098; 839 KB
 The Darkest Puzzle-4-Al Qaeda.png 1,053 × 4,115; 315 KB
 The Darkest Puzzle-5-Planes.png 1,053 × 4,846; 423 KB
 The Darkest Puzzle-6-Pentagon.png 1,053 × 3,998; 329 KB
 The Darkest Puzzle-7-World Trade Center.png 1,053 × 8,259; 857 KB
 LEGO Brick-Door 1 x 3 x 1 Left-3822.png 53 × 41; 5 KB
 Star Wars-Fighter Pods 1-Official Checklist.pdf 1,275 × 1,650, 2 pages; 880 KB
 TMEC-The Eleventh Hour-Letter from Mr. X.jpg 3,200 × 4,144; 1.01 MB
 TMEC-The Eleventh Hour-Forrest City Post-Page 1.jpg 3,200 × 4,077; 4.72 MB
 TMEC-The Eleventh Hour-Forrest City Post-Page 2.jpg 3,200 × 4,054; 5.62 MB
 TMEC-The Eleventh Hour-Forrest City Post-Page 3.jpg 3,200 × 4,044; 4.82 MB
 TMEC-The Eleventh Hour-Forrest City Post-Page 5.jpg 3,200 × 3,966; 4.9 MB
 TMEC-The Eleventh Hour-Forrest City Post-Page 4.jpg 3,200 × 4,071; 5.3 MB
 TMEC-The Eleventh Hour-Forrest City Post-Page 6.jpg 3,200 × 4,010; 4.57 MB
 TMEC-The Eleventh Hour-Forrest City Post-Page 7.jpg 3,200 × 3,968; 4.72 MB
 TMEC-The Eleventh Hour-Forrest City Post-Page 8.jpg 3,200 × 3,971; 6.12 MB
 TMEC-The Eleventh Hour-Notes taken by Christopher-Page 1.jpg 3,179 × 4,117; 1.33 MB
 TMEC-The Eleventh Hour-Notes taken by Christopher-Page 2.jpg 3,188 × 4,128; 1.09 MB
 TMEC-The Eleventh Hour-Notes taken by Christopher-Page 3.jpg 3,168 × 4,102; 1.2 MB
 TMEC-The Eleventh Hour-Notes taken by Christopher-Page 4.jpg 3,167 × 4,101; 852 KB
 TMEC-The Eleventh Hour-Notes taken by Christopher-Page 5.jpg 3,179 × 4,117; 1.18 MB
 TMEC-The Eleventh Hour-Notes taken by Christopher-Page 6.jpg 3,162 × 4,094; 949 KB
 TMEC-The Eleventh Hour-Notes taken by Christopher-Page 7.jpg 3,180 × 4,118; 1.02 MB
 TMEC-The Eleventh Hour-Notes taken by Christopher-Page 8.jpg 3,176 × 4,113; 1.02 MB
 TMEC-The Eleventh Hour-Notes taken by Christopher-Page 9.jpg 3,179 × 4,117; 962 KB
 TMEC-The Eleventh Hour-Notes taken by Christopher-Page 10.jpg 3,173 × 4,109; 1.29 MB
 TMEC-The Eleventh Hour-Title Card-Front.jpg 4,757 × 3,200; 1.77 MB
 TMEC-The Eleventh Hour-Title Card-Back.jpg 4,730 × 3,200; 1.61 MB
 TMEC-The Eleventh Hour-People-April Heart.jpg 3,200 × 4,913; 1.87 MB
 TMEC-The Eleventh Hour-People-Casey Cavanaugh.jpg 3,200 × 4,866; 1.81 MB
 TMEC-The Eleventh Hour-People-David Denton.jpg 3,200 × 4,789; 2.11 MB
 TMEC-The Eleventh Hour-People-Grace Whittington.jpg 3,200 × 4,817; 1.95 MB
 TMEC-The Eleventh Hour-People-Johnson Savage.jpg 3,200 × 4,823; 1.64 MB
 TMEC-The Eleventh Hour-People-Julie Bull.jpg 3,200 × 4,795; 1.67 MB
 TMEC-The Eleventh Hour-People-Marta Perez.jpg 3,200 × 4,884; 1.31 MB
 TMEC-The Eleventh Hour-People-Robert MacKenzie.jpg 3,200 × 4,818; 1.34 MB
 TMEC-The Eleventh Hour-People-Sonya Grant.jpg 3,200 × 4,822; 1.53 MB
 TMEC-The Eleventh Hour-People-William Thorn.jpg 3,200 × 4,835; 1.67 MB
 TMEC-The Eleventh Hour-New Year's Eve Invitation-Front.jpg 3,200 × 4,995; 2.12 MB
 TMEC-The Eleventh Hour-New Year's Eve Invitation-Back.jpg 3,200 × 5,110; 1.79 MB
 TMEC-The Eleventh Hour-Bedford Manor-First Floor Plan.jpg 3,194 × 4,836; 880 KB
 TMEC-The Eleventh Hour-Bedford Manor-First Floor.jpg 4,771 × 3,200; 1.79 MB
 TMEC-The Eleventh Hour-Bedford Manor-Foundation Level Plan.jpg 3,200 × 4,951; 968 KB
 TMEC-The Eleventh Hour-Bedford Manor-Foundation Level.jpg 4,675 × 3,200; 1.99 MB
 TMEC-The Eleventh Hour-Bedford Manor-Second Floor Plan.jpg 3,200 × 4,823; 1,013 KB
 TMEC-The Eleventh Hour-Bedford Manor-Second Floor.jpg 4,812 × 3,200; 1.96 MB
 TMEC-The Eleventh Hour-Bedford Manor-Third Floor Plan.jpg 3,200 × 4,907; 913 KB
 TMEC-The Eleventh Hour-Bedford Manor-Third Floor.jpg 4,707 × 3,200; 2.39 MB
 TMEC-The Eleventh Hour-Hangman.jpg 4,136 × 3,200; 3.61 MB
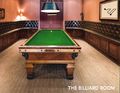 TMEC-The Eleventh Hour-The Billiard Room.jpg 4,141 × 3,200; 4.96 MB
 TMEC-The Eleventh Hour-Billiard Balls-Front.jpg 3,200 × 4,135; 1.43 MB
 TMEC-The Eleventh Hour-Billiard Balls-Back.jpg 3,200 × 4,139; 517 KB
 TMEC-The Eleventh Hour-Drawers.jpg 3,200 × 2,155; 2.56 MB
 TMEC-The Eleventh Hour-Bedford Manor-Postcard.jpg 4,794 × 3,200; 2.63 MB
 TMEC-Sector 7-Sector7Containment.png 2,187 × 1,423; 119 KB
 TMEC-Sector 7-Sector7Station4.png 1,860 × 1,876; 175 KB
 TMEC-Sector 7-Sector7Station64.png 2,172 × 1,673; 140 KB
 TMEC-Sector 7-Sector7Station12.png 1,663 × 1,680; 119 KB
 TMEC-Sector 7-Sector7Station146.png 1,670 × 1,681; 120 KB
 TMEC-Sector 7-Sector7Station20.png 1,665 × 1,680; 120 KB
 TMEC-Sector 7-Sector7Exit.png 1,635 × 1,636; 844 KB
 TMEC-Sector 7-Sector7Surveillance.png 1,634 × 1,633; 883 KB
 TMEC-Sector 7-Christopher's Curiosities-Facebook Post 01-Photo.jpg 1,920 × 1,440; 215 KB
 TMEC-Sector 7-Christopher's Curiosities-Facebook Post 02-Photo.jpg 1,108 × 1,600; 85 KB


