Difference between revisions of "The Mystery Experiences Company"
Morbus Iff (talk | contribs) |
Morbus Iff (talk | contribs) |
||
| Line 758: | Line 758: | ||
=== Other items and photos === | === Other items and photos === | ||
| − | <gallery mode="packed" heights=" | + | <gallery mode="packed" heights="200px"> |
| + | File:TMEC-The Eleventh Hour-Bedford Manor-Postcard.jpg|[[Bedford Manor]] | ||
| + | File:TMEC-The Eleventh Hour-Drawers.jpg|Drawers and symbols puzzle | ||
File:TMEC-The Eleventh Hour-Photos-01.jpg|Exterior of the box | File:TMEC-The Eleventh Hour-Photos-01.jpg|Exterior of the box | ||
File:TMEC-The Eleventh Hour-Champagne Flute.jpg|Champagne flute | File:TMEC-The Eleventh Hour-Champagne Flute.jpg|Champagne flute | ||
| − | File:TMEC-The Eleventh Hour- | + | File:TMEC-The Eleventh Hour-Photos-02.jpg|First half of the wristband. |
| − | + | File:TMEC-The Eleventh Hour-Photos-03.jpg|Second half of the wristband. | |
| − | File:TMEC-The Eleventh Hour-Photos- | + | File:TMEC-The Eleventh Hour-Photos-04.jpg|Black napkin, silver necklace. |
| − | + | File:TMEC-The Eleventh Hour-Photos-05.jpg|White napkin, silver necklace. | |
| − | File:TMEC-The Eleventh Hour-Photos-04.jpg | + | File:TMEC-The Eleventh Hour-Photos-06.jpg|Black napkin, gold necklace. |
| − | File:TMEC-The Eleventh Hour-Photos-05.jpg | ||
| − | File:TMEC-The Eleventh Hour-Photos-06.jpg | ||
| − | |||
</gallery> | </gallery> | ||
== The investigation == | == The investigation == | ||
Revision as of 14:53, 22 October 2018
Contents
- 1 The Eleventh Hour
- 1.1 What's in the box
- 1.1.1 Introduction card
- 1.1.2 Letter from Mr. X
- 1.1.3 Forrest City Post volume 5 issue 32 page 1
- 1.1.4 Forrest City Post volume 5 issue 32 page 2
- 1.1.5 Forrest City Post volume 5 issue 32 page 3
- 1.1.6 Forrest City Post volume 5 issue 32 page 4
- 1.1.7 Forrest City Post volume 5 issue 32 page 5
- 1.1.8 Forrest City Post volume 5 issue 32 page 6
- 1.1.9 Forrest City Post volume 5 issue 32 page 7
- 1.1.10 Forrest City Post volume 5 issue 32 page 8
- 1.1.11 Notes taken by Christopher page 1
- 1.1.12 Notes taken by Christopher page 2
- 1.1.13 Notes taken by Christopher page 3
- 1.1.14 Notes taken by Christopher page 4
- 1.1.15 Notes taken by Christopher page 5
- 1.1.16 Notes taken by Christopher page 6
- 1.1.17 Notes taken by Christopher page 7
- 1.1.18 Notes taken by Christopher page 8
- 1.1.19 Notes taken by Christopher page 9
- 1.1.20 Notes taken by Christopher page 10
- 1.1.21 New Year's Eve invitation front
- 1.1.22 New Year's Eve invitation back
- 1.1.23 Bedford Manor first floor
- 1.1.24 Bedford Manor second floor
- 1.1.25 Bedford Manor third floor
- 1.1.26 Bedford Manor foundation level
- 1.1.27 Hangman puzzle
- 1.1.28 The Billiard Room puzzle
- 1.1.29 Character headshots
- 1.1.30 Other items and photos
- 1.2 The investigation
- 1.1 What's in the box
The Eleventh Hour
What's in the box
Introduction card
|


Letter from Mr. X
|

Forrest City Post volume 5 issue 32 page 1
|

Forrest City Post volume 5 issue 32 page 2
|

Forrest City Post volume 5 issue 32 page 3
|

Forrest City Post volume 5 issue 32 page 4
|

Forrest City Post volume 5 issue 32 page 5
|

Forrest City Post volume 5 issue 32 page 6
|

Forrest City Post volume 5 issue 32 page 7
|

Forrest City Post volume 5 issue 32 page 8
|

Notes taken by Christopher page 1
|

Notes taken by Christopher page 2
|

Notes taken by Christopher page 3
|

Notes taken by Christopher page 4
|

Notes taken by Christopher page 5
|

Notes taken by Christopher page 6
|

Notes taken by Christopher page 7
|

Notes taken by Christopher page 8
|

Notes taken by Christopher page 9
|

Notes taken by Christopher page 10
|

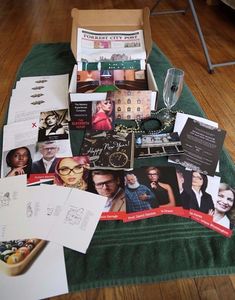
New Year's Eve invitation front
|

New Year's Eve invitation back
|

Bedford Manor first floor
|


Bedford Manor second floor
|


Bedford Manor third floor
|


Bedford Manor foundation level
|


Hangman puzzle
E _ E _ _ G_ _ _ _ _ _ _N _ _ H _ _ _ _ N H _ N G _ _ N. B E G _ N _ N _ H E _ _ B _ _ _ _ . |

The Billiard Room puzzle
→ N H Z W Q U I J N C M S N O X W O E S V W L S A Z A E D N T A G F H O V C L L S A V O O B T N S I E T A H M V H I L V L S W B E I C W D N H I A G N C G L M L A F N F J Y P A O G R Y X S A Z S G O I J L O L V U L A L L A N D D B T N O N V M L V N A F N S O L |


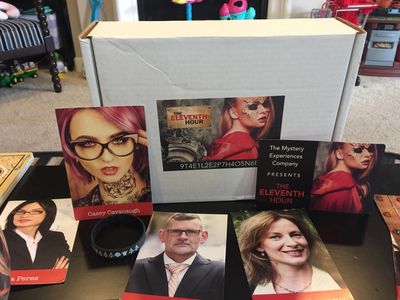
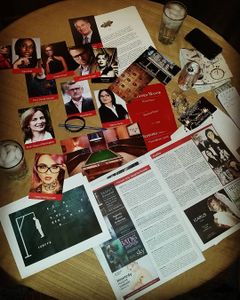
Character headshots
- TMEC-People-Julie Bull-The Eleventh Hour.jpg
- TMEC-People-Casey Cavanaugh-The Eleventh Hour.jpg
- TMEC-People-David Denton-The Eleventh Hour.jpg
Prof. David Denton
- TMEC-People-Sonya Grant-The Eleventh Hour.jpg
- TMEC-People-April Heart-The Eleventh Hour.jpg
April Heart
June 6, 1940 - TMEC-People-Robert MacKenzie-The Eleventh Hour.jpg
- TMEC-People-Marta Perez-The Eleventh Hour.jpg
- TMEC-People-Johnson Savage-The Eleventh Hour.jpg
- TMEC-People-William Thorn-The Eleventh Hour.jpg
- TMEC-People-Grace Whittington-The Eleventh Hour.jpg
Prof. Grace Whittington
Other items and photos
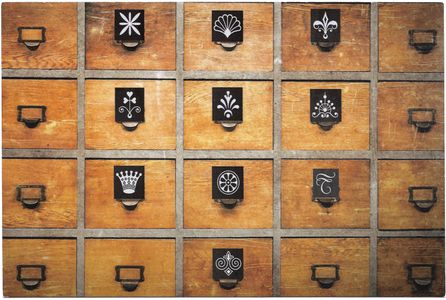
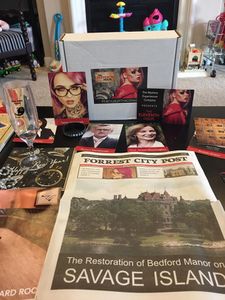
Drawers and symbols puzzle
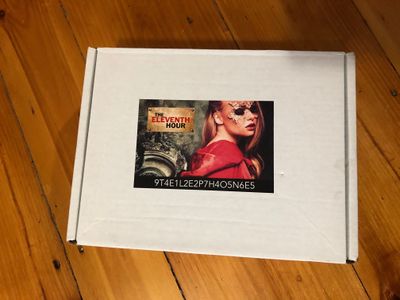
Exterior of the box
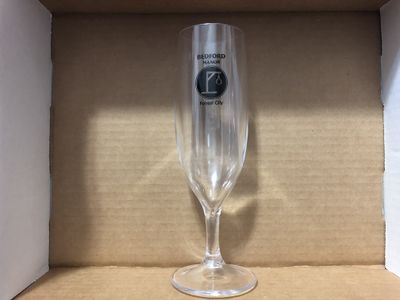
Champagne flute
First half of the wristband.
Second half of the wristband.
Black napkin, silver necklace.
White napkin, silver necklace.
Black napkin, gold necklace.


